Yoga for knee pain

Padahastasana
Position Distance your legs hip-width apart.
Step 1: Inhale and slowly raise your arms upwards. Stretch your body upwards as well.
Step 2: Exhale and slowly bend the trunk forward from your hips till your hands reach your feet. Next, place the palms of your hands under the soles.
Step 3: Inhale head up extend your spine forward by keeping your palm under the feet.
Step 4: Exhale complete forward bend to touch your head to the knee. (Elbows remain slightly bent pointing outwards. Loosen up the shoulders and let the arms relax. Take a few slow breaths. Your knees must remain straight. The back ought to be concave not hunched. Bring the forehead between the knees if possible. Relax the back muscles of your neck. Take long and deep breaths. Relax the body. Stay in this position for as long as you feel comfortable.)
Step 5: Release palms down from foot and inhale slowly come up.
Practice the pose 3 times for 5 breaths gradually increasing the time day by day as your flexibility increases.
Bound Angle Pose or Baddha Konasana
Position Sit straight on the floor with an erect spine and straight legs.
Step 1: Bend your knees by bringing feet as close as possible.
Step 2: Hold your feet tightly with your hands. Inhale deeply. Keep breathing normally and start flapping like a butterfly by bringing thighs up and down slowly.
Bridge Pose
Position Lying on your back, bend both knees and place the feet flat on the floor hip-width apart. Keep knee and ankle in one line. Press the feet into the floor,
Step 1: Inhale and lift the hips, rolling the spine off the floor. ... Press down into the arms and shoulders to lift the chest up. ... Breathe and hold for 4-8 breaths.
Step 2: To release: exhale and slowly roll the spine back to the floor.
Watch our Video on Best Effective Yoga Asanas For BackBend
Extended Hand-To-Big-Toe Pose
Position Stand in Tadasana, bring your left knee toward your belly. Reach your left arm inside the thigh and hold the big toe or outside of your left foot. Firm the front thigh muscles of the standing leg, and press the outer thigh inward.
Step 1: Inhale and extend the left leg forward. Straighten the knee as much as possible. If you're steady, swing the leg out to the side. Breathe steadily; breathing takes concentration, but it helps you balance.
Step 2: Hold for 30 seconds, then swing the leg back to the centre with an inhale, and lower the foot to the floor with an exhale. Repeat on the other side for the same length of time.
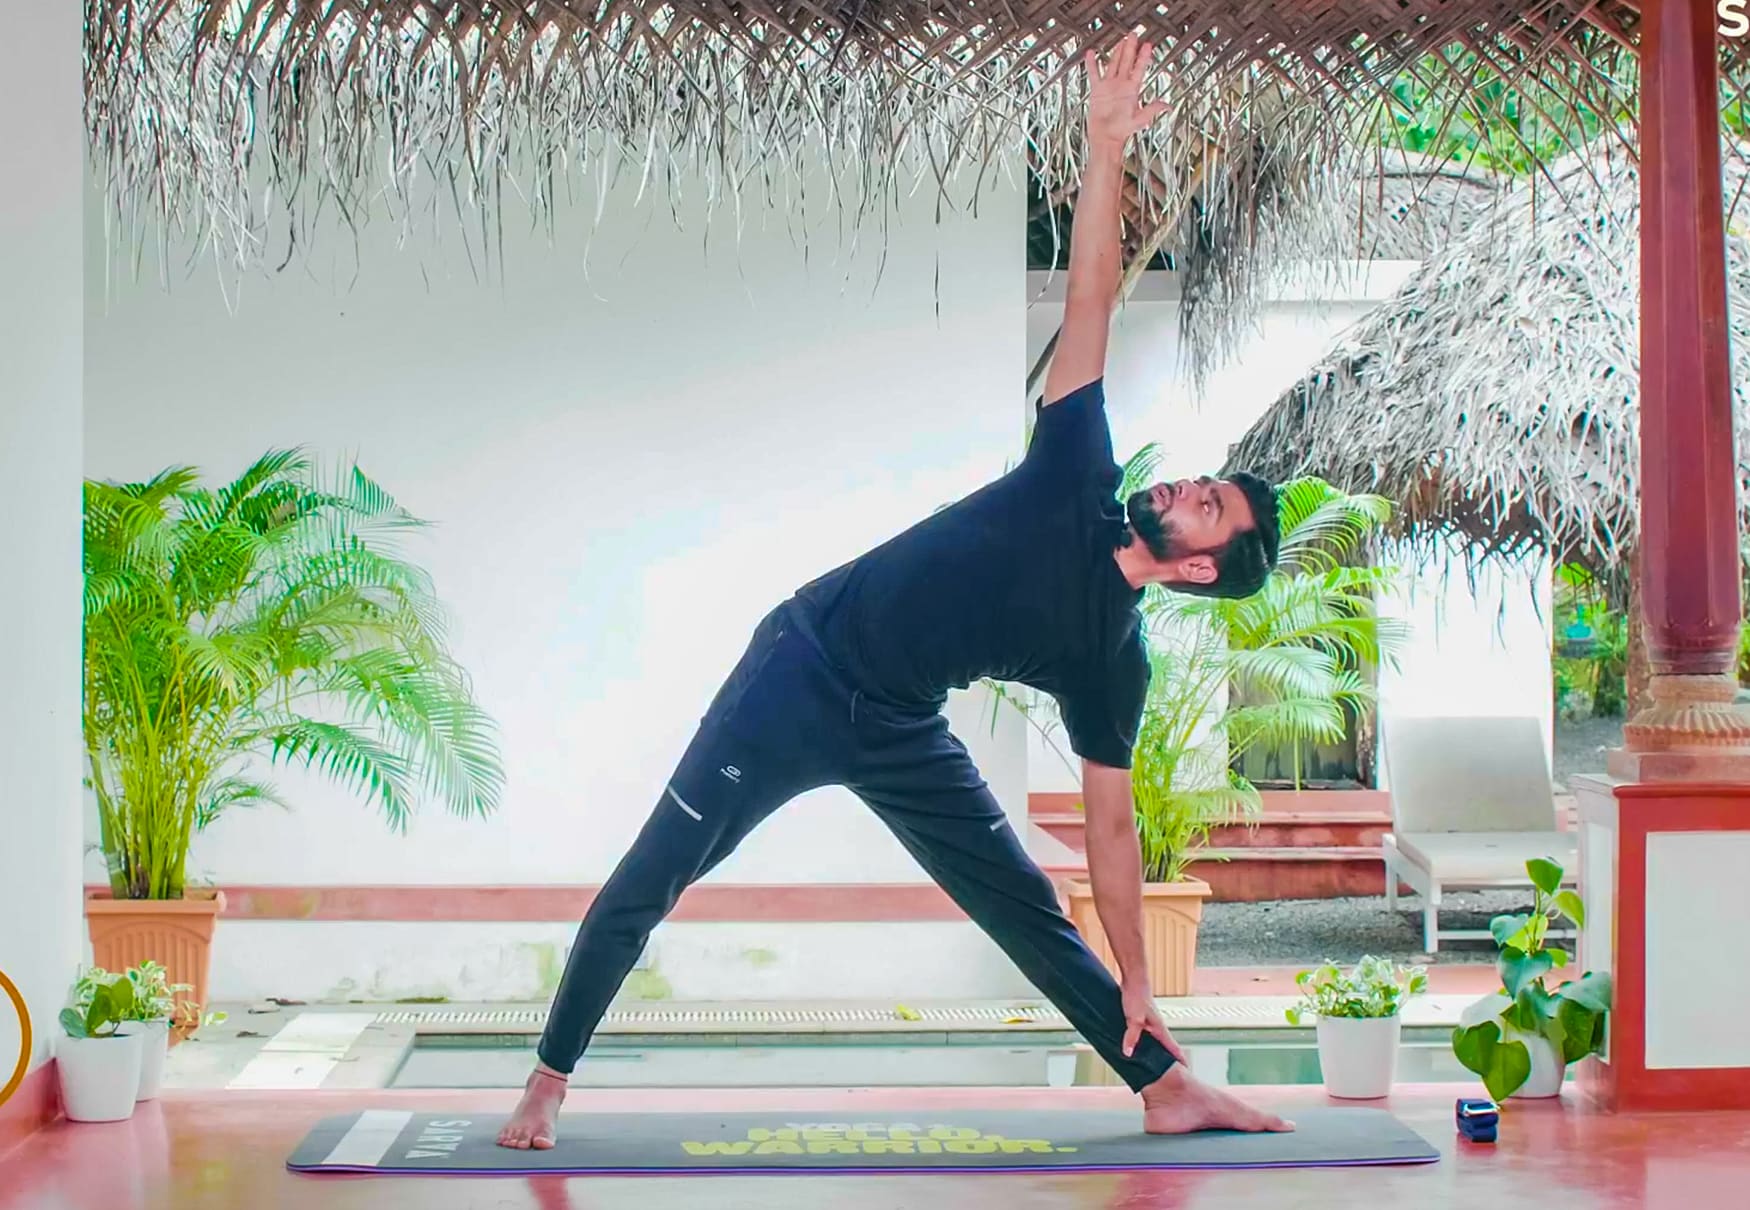
Extended Triangle Pose
Position Standing at the top of your mat with your feet hip-distance apart and your arms at your sides. Begin to pay attention to your breath. Let go of distractions. Breathe softly and fully. Take a moment to tune into your body and draw your awareness inward.
- Step your feet wide apart, about 4 to 5 feet. Check to ensure that your heels are aligned with each other.
- Turn your right foot out 90 degrees so your toes are pointing to the top of the mat. The centre of your right knee cap should be aligned with the centre of your right ankle.
- Pivot your left foot slightly inwards. Your back toes should be at a 45-degree angle.
- Lift through the arches of your feet, while rooting down through your ankles.
Step 1: Inhale raise your arms to the side to shoulder height, so they’re parallel to the floor. Your arms should be aligned directly over your legs. With your palms facing down, reach actively from fingertip to fingertip.
Step 2: Exhale, reach through your right hand in the same direction as your right foot is pointed. Shift your left hip back so your tailbone and pelvis tilt toward the wall or space behind your left foot. Fold at your right hip. Keep your right ear, shoulder, and knee on the same plane — do not let your torso drop forward. Turn your left palm forward, with your fingertips reaching toward the sky.
- Rest your right hand on your outer shin or ankle. If you are more flexible, place your right fingertips or palm on the floor to the outside of your right shin. You can also place your hand on a block. Align your shoulders so your left shoulder is directly above your right shoulder.
- Gently turn your head to gaze at your right thumb.
- Drawdown through the outer edge of your back foot. Extend equally through both sides of your waist. Lengthen your tailbone toward your back heel. Keep your left arm in line with your shoulders.
- Hold for up to one minute.
Step 3: To release, inhale and press firmly through your left heel as you lift your torso. Lower your arms. Turn to the left, reversing the position of your feet.
Repeat for the same length of time on the opposite side.
Note Avoid practising this yoga if you suffer from migraines. A person who is detected with diarrhoea, high blood pressure, neck & back injuries, shouldn't perform this asana.
